You’re So Sweet: March 14

IMG_5631

March 14 is quite a busy day for sweets on both ends of the Pacific Ocean.

In Japan, the day is called, “White Day.” No, it has nothing to with race, of course, but it has a lot to do with love and sugar. You see, Valentine’s Day, on February 14, is the Japan’s equivalent of Sadie Hawkins Day where a girl gets to ask a guy she likes out, or at least tell him how she feels about him, by giving him chocolates.

It’s a clever marketing ploy by a chocolate company, I tell you, but it’s a big deal for them gals!  Some of them wait an entire year for this special day and wait patiently until the 14th of the following Month, on White Day, to receive a response from the guy via white chocolate or marshmallow, hence the name.

Here, in the U.S., it’s National Pi Day!

The two events occasioned me to bake something sweet and because I wasn’t in the mood for pie, I went for some good old brownies, courtesy of Martha Stewart.  I know brownies have nothing to do with White Day or Pi Day, but I say sugar is sugar!

IMG_5626

I used the Godiva dark chocolate bars that I received as a birthday gift a few months ago, and added one cup each of dried cranberries, chopped almonds, and white chocolate chips, in an attempt to clear out the freezer. I think these made the brownies extra decadent, perfect for the sweet March 14.

Surfas Breadmaking Class: Bread #5: Brioche

IMG_0476

I think it was my mother who once told me that if I want to quit eating sweets, I should make them myself. She said that if I see, first hand, how much sugar and fat are in it, I will surely quite eating it. Her point was valid because I no longer consume buttercream frosting after learning how much artery-clogging butter went into making the frosting during my cupcake-making days.

Because of that reason, I was very hesitant to bake Brioche at the bread workshop at Surfas Culinary District in Culver City. I just wanted to forever stay in a sugar-coated world where I was completely oblivious to the amount of butter and eggs that were packed in those cute, seemingly innocent French pastry.

But I suppose I can’t stay sheltered forever. It was time for me to face the music.  Here I go!

IMG_0371

A stand mixer definitely comes in handy in making the dough. I can’t imagine trying to do this by hand.

First you need to dissolve the yeast by whisking it with milk. Then add the flour and mix in a stand mixer with a dough hook. Add eggs and mix for 4-5 minutes.

Increase the speed to medium, and slowly add the butter (BUTTER!), tablespoon or two at a time. Continue to mix for 15 minutes to develop the gluten for a light, airy structure in bread.

IMG_0389

Now add sugar and salt and mix for 5-8 minutes. Conduct the “window pane” test (spread a tiny dough piece with your fingers into a thin translucent layer). If you can see through the layer without it ripping, you are ready to transfer the dough onto a buttered sheet pan and cover it with a plastic wrap.

Let it sit for at least 6 hours, or overnight.

IMG_0431

After the dough has rested for at least 6 hour, or overnight, turn the cold dough onto a greased pan. Divide the dough in half.  Then press one portion of dough into an even rectangle about 2 inches thick.

IMG_0437

Take the rectangle in half lengthwise and cut it crosswise into 6 equal portions. The recipe makes a total of 12 equal pieces.

IMG_0439

Roll the dough into balls.

IMG_0440

You have many option to shape the Brioche (i.e. in a loaf pan) but we made many small ones with little 2-3 balls per baking cup.

Place the Brioches in a pan.  Cover the pan loosely with plastic wrap and set them aside for about 45 minutes until the dough has risen to the level of the pan rim.

IMG_0445

Unwrap the dough, brush them with melted butter and sprinkle with sugar.  Bake at 350 degree F for 30 minutes, rotating the after 20 minutes.  Reduce the oven temperature to 325 degree F and continue to bake or 25-30 minutes, or until they are golden brown on top.

IMG_0473

Transfer to cooling rack and let them cool completely.

IMG_0474

Look at these cute little Brioche!  They look like baby’s little bums!

So making Brioche wasn’t as scary as I thought.  Yes, there are quite a bit of butter (almost two sticks, to make two 8-1/2 inch loaves) and eggs (three altogether) but it’s not that bad as long as you just eat only one or two of the little ones.  It’s difficult to stay disciplined though because these little morsels are lovely, so lovely that you really can’t decide if they are bread or actually pastry.

IMG_0486

I ate one in class while it was still warm, and another one with a cup of coffee when I got home that afternoon.

Everything about Brioche was a music to my ears … and my tummy.

Cronuts

IMG_9309

Maya and I finally got to experience the real Cronut during our recent trip to New York City. The famous croissant and donut hybrids were sold out on our last visit, so we decided to make it our priority to get our hands on them this time around. We dropped off our luggage in Midtown and made a beeline to Dominique Ansel Bakery in Soho.

IMG_2491

There was already a line, about 20 people deep, when we arrived around 9:00 a.m. We had to wait for about an hour just to get inside the shop, which was another 20 minutes or so. We were a bit surprised because we thought the Cronut fever has died down by now, especially with all the other donut shops and patisseries offering copycat treats, but that surely wasn’t the case. The lady in front of us, a regular, told us that the line is usually much worse earlier in the morning.

IMG_2493

The Cronuts were already packaged in a yellow box and stacked near the register to speed up the line. Maya ordered a cup of coffee and I grabbed a cup of Earl Grey tea and seated ourselves on a small table near the door.

Now, the moment of truth …

IMG_2496

What I liked:

The Cronut definitely tasted more like a croissant than a donut, unlike some imitation faux-nuts (or “do-ssant”) at neighborhood 24-hour donut shops. It tasted like a very sophisticated dessert. I enjoyed the slight chewiness of the dough as well.

What I didn’t like:

A little too much pastry cream in the middle. The flavor of the day was strawberry and although I enjoyed the sweet and tangy combination of the berries, the cream tasted slightly off to me. I would have loved to try the simple vanilla pastry cream instead.

The verdict: ★★★★☆

IMG_2499

Extra: We ordered bake-to-order mini Madeleines. They were good but weren’t eye-popping or anything.

IMG_2497

I Love Lollipop Love

IMG_2340

I love the idea of making things from scratch. Like, from scratch scratch, as in I-want-a-sheep-so-I-can-make-my-own-yarn scratch. But since owning a sheep is not feasible at the moment, I resorted to making lollipops from scratch, like, you know, from sugar.

Here, I made Basic Lollipops from the book, Lollipop LoveDessert First’s Anita Chu’s third and newest dessert cookbook that came out last month.

I’ve been a fan her blog for years, and I admire her so much that I even asked her to be my friend on Facebook. And I jump up in joy, like a teenage girl at a boy band’s concert, when she occasionally leaves me sweet comments. Her stunning photography and warm writing style makes me feel like I’m reading a beautiful spread on a glossy magazine while sipping tea in Jardin du Luxembourg in Paris.

IMG_2327

Despite the fact that this was my first attempt at making candies from scratch (I’m made caramel but never hard candies), I think they turned out pretty well. Working with sugar was a little scary because the liquid can get really, really hot (up to 300 degree F), but I managed not to burn myself or turn the sugar into caramel (or worse, to a black tar). Pouring the liquid into a mold was a bit of a challenge, especially because you have to work very quickly, but it got easier by the third or forth cavity.

The only mistake I made was using a flavor oil. I used a strawberry flavoring liquid I purchased from LorAnn Oils and it created a slightly medicine-y taste. I think I put too much but I think I’ll be sticking to natural flavors going forward.

IMG_2433

I tried out another recipe from the book the other day. This time, I tried the Peach Iced Tea Lollipops recipe. Instead of the peach tea, I used Rose Royal black tea from my favorite tea house, Lupicia. I brewed two tablespoons of tea leaves with a cup of hot water and mixed that with sugar. I LOVED the flavor (reminded me of the candy version of a popular Japanese tea, Gogo no Kocha, or Afternoon Tea). I might reduce the tea leaves to one tablespoon instead of two next time since the brew came out pretty strong.

I hope you pick up the book and start making some delicious homemade candies free of artificial ingredients!

“Everyday” Caramelized Onion Muffins

IMG_1205

First came the Smile Biscuits, then the Sesame Sticks, and now, the Onion Muffins! I can’t tell you how much I’m enjoying the “everyday” cookbook series by Shiho Nakashima. They’re definitely two of my favorite book purchases of 2014.

The Onion Muffin recipe is in the book, “Mainichi (everyday) Tabetai (want to eat) Gohanno (meal) Youna (like) Keiki (cake) To (and) Maffin (muffin) no (of) Hon (book) まいにち食べたい”ごはんのような”ケーキとマフィンの本.” Instead of cookies and biscuits, this book focuses on cakes and muffins.

IMG_1210

So, savory caramelized onion in sweet muffins, you might ask? I was a little confused at first too, and even more confused that the author named this as her “basic” recipe. I would think the basic would be something like blueberry or chocolate chips, but she wrote that she chose this particular recipe because it just tastes fantastic. I guess that’s a good enough reason!

IMG_1211

I must admit that I didn’t love the muffins. I liked the lovely balance of sweet and savory, and they were actually delicious (and fluffy, considering there’s no eggs in them), but they tasted more like cornbread than a muffin. I think I might like to serve these on a side of soup or salad, and not necessarily eat them as dessert with a cup of tea.

Oh, and I actually tried the banana muffins from the book and those were pretty awesome. They were so good, they disappeared even before I had the chance to take photos. Maybe it’s a good thing so I don’t have to change my blog name to “Baking My Way Through the ‘Everyday’ Bake Books.” 🙂

My Favorite NYC Moments #4: Serenpidity 3

serendipidy

The restaurant decor is tacky and the service is mediocre (oh, and it’s almost an hour wait to get a table) but when you walked for what felt like 3,495 miles and your legs are about to fall off, nothing refuels your body faster than a super sugary drink from Serendipity 3.

Believe the hype – its famous Frrrrozen Hot Chocolate is truly amazing! Blended drinks from Coffee Beans and Starbucks don’t even come close.

IMG_9343

The signature Frrrrozen Hot Chocolate.  I loved the texture of the crushed ice.

IMG_9344

Maya got Frozen Espresso which was also delicious! We got brain AND tummy freezes simultaneously!

Here’s the full list of my top 10 moments:

  1. Dinner at Villard Michel Richard
  2. Lunch at Babbo
  3. Picnic at Central Park
  4. Serendipity 3
  5. Lunch at Balthazar
  6. Grand Central Oyster Bar
  7. Gahm Mi Oak
  8. Dominique Ansel Bakery
  9. La Vie at JFK
  10. Bryant Park at night

My Favorite NYC Moments #8: Dominique Ansel Bakery

IMG_9309

Okay, Cronuts were already sold out when we got to Dominique Ansel Bakery in the afternoon and I didn’t even try the other popular desserts like Chocolate Chip Cookie Milk Shot, but the chocolate eclair I had was pretty good!  And it gave me an excuse to hang out in SoHo, one of my my favorite areas in NYC.

IMG_9305

IMG_9306

Here’s the full list of my top 10 moments:

  1. Dinner at Villard Michel Richard
  2. Lunch at Babbo
  3. Picnic at Central Park
  4. Serendipity 3
  5. Lunch at Balthazar
  6. Grand Central Oyster Bar
  7. Gahm Mi Oak
  8. Dominique Ansel Bakery
  9. La Vie at JFK
  10. Bryant Park at night

Holiday Icebox Cookies

IMG_7901

I finally realized that the best way to control my cookie intake during the holidays is by making icebox cookies. They’re genius – simply make the dough, freeze it, and bake only the amount you want, instead of making the entire batch and rushing to eat the cookies before they go stale (or whatever excuses I can come up with).

Okay, mine are not technically “icebox cookies” since the doughs were frozen in a shape of a ball instead of a log, and I rolled it out instead of slicing from the log, but you get the gist.  They keep for weeks in a refrigerator and months in a freezer and your favorite cookies are right at your fingertip, whenever you’re crazing a few pieces of delicious dessert.

I made doughs for my favorite cookies over the weekend and baked a few today for an afternoon tea with a friend.  It took only a few minutes to cut out the dough and bake them.  I love a hassle-free prep.

I can’t believe that Christmas is less than a week away! This year’s Christmas seems to creep up much quicker than usual, thanks to Thanksgiving falling on the 28th.

Macaron Days

IMG_7819

My husband and I have an arbitrary rule, that we are allowed one holiday-inspired drink at Starbucks a year. The reason for having it only once every 365 days is two-fold: One, it’s too sugary to drink regularly; and two, it makes the cup extra special, knowing that it only comes around once a year. We know that Christmas is around the corner when we take a sip of the Salted Caramel Latte (him) and Peppermint Hot Chocolate (me).

This year’s cup was extra special because we got to pair it with Laduree’s macarons! Our friends recently got married in the groom’s hometown, and since we couldn’t attend the wedding, they brought back a little delicious souvenir from NYC. A several days have passed since the couple’s return to the Southland and these little macarons were a little on the stale side, but they were still heavenly and brought me back to Champs-Elysees in Paris where the famous French tea house, and (as some story has it) the originator of macaron, stands proudly.

IMG_7878

Speaking of maracons, my husband surprised me with more macarons last night —  this time from Renaud’s Patisserie in Santa Barbara (I raved about this place before, here). He asked his co-worker who was coming down from Santa  Barbara to pick up two assorted boxes for us.  I have the best husband in the world (I hope you’re reading this, Kevin!).

I love the holiday season!

IMG_7880

Mini Strawberry Tarts

IMG_6076

There are so many different ways to reach the same destination when it comes to baking. Everyone and their mothers have their own version of how to make the basics – like pie dough, pate choux, and pastry cream. Navigating through baking books and online recipes can be overwhelming at times with countless variations to choose from, so I usually narrow down to these three experts to guide me through the process: Dorie Greenspan, David Lebowitz, and Martha Stewart.

This is not to say that I don’t seek other patisseries’ tutelage — I do. I have overflowing shelves full of baking books from other authors to prove it.  But when I’m in a need of an absolute fool-proof recipes for French-inspired desserts (and am not particularly in the mood to experiment), I go straight to Greenspan, Lebowitz, and Stewart, as I consider them to be the definitive authorities on the subject. Although they are all American, two formers live in Paris (I thinks Greenspan travels back and forth to Paris and New York) and their authenticities are certainly not lost in translation. And of course, Martha. Martha, Martha, Martha. Love her or hate her (and I happen to love her, clearly), there’s no denying that her recipes come out perfect, every. single. time.

When I was searching for the recipe for pastry cream for the strawberry tart, I compared all three. Greenspan and Lebowitz’s recipes were very similar, but Stewart’s used a few less eggs … and since I was down to just four eggs in the refrigerator (as opposed to six), I decided to go with the Domestic Queen’s version.

And the result? Fantastic, of course, sandwiched between the buttery pate sucree and fresh strawberries.

Pastry Cream
Makes about 2 ½ cups
Adapted from marthastewart.com

2 cups whole milk
1/2 cup sugar
1/2 vanilla bean, split lengthwise, seeds scraped
Pinch of salt
4 large egg yolks
1/4 cup cornstarch
2 tablespoons unsalted butter, cut into small pieces

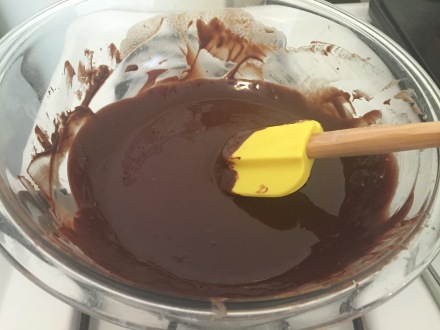
In a medium saucepan, combine milk, 1/4 cup sugar, vanilla bean and seeds, and salt. Cook over medium heat until mixture comes to a simmer.

In a medium bowl, whisk together egg yolks, cornstarch, and remaining 1/4 cup sugar. Whisking constantly, slowly pour about 1/2 cup of the hot-milk mixture into the egg-yolk mixture, 1/2 cup at a time, until it has been incorporated. Pour mixture back into saucepan, and cook over medium-high heat, whisking constantly, until it thickens and registers 160 degrees on an instant-read thermometer, about 2 minutes. Remove and discard vanilla bean.

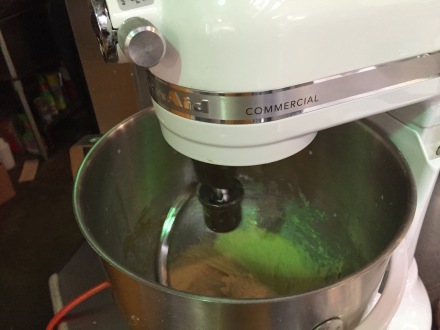
Transfer to the bowl of an electric mixer fitted with the paddle attachment. Add the butter, and beat on medium speed until the butter melts and the mixture cools, about 5 minutes.

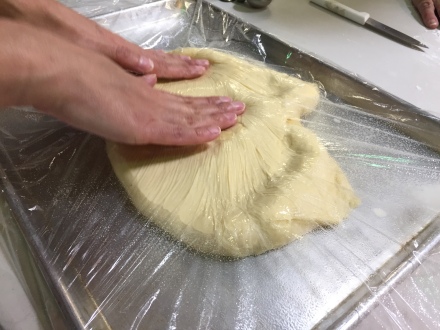
Cover with plastic wrap, pressing it directly onto the surface of the pastry cream to prevent a skin from forming. Refrigerate until chilled, at least 2 hours or up to 2 days. Just before using, beat on low speed until smooth (you can also whisk by hand).

IMG_6070

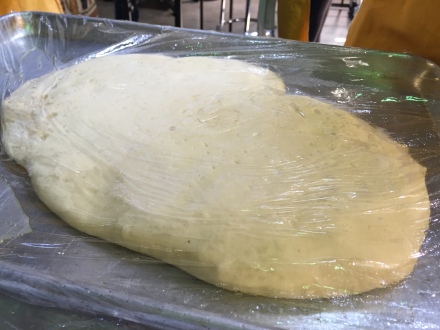
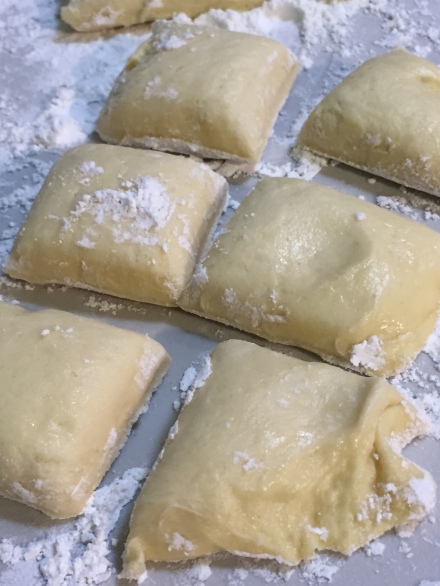
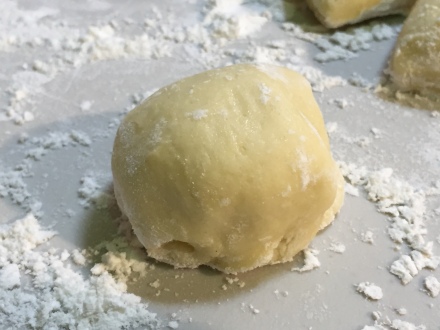
I used the same pate sucree (sweet dough) recipe as the Tarte Aux Pommes I made the other day (click here for the recipe). See, I told you I use other pastry chef’s recipes too!  lol

IMG_6072

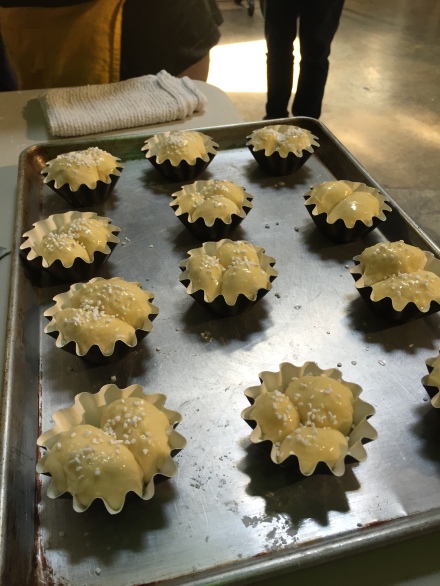
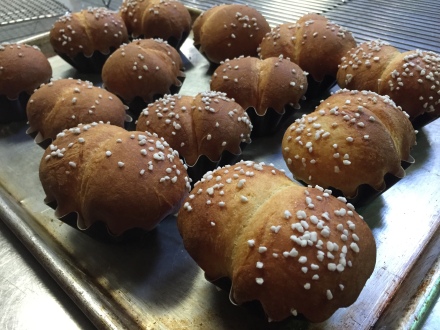
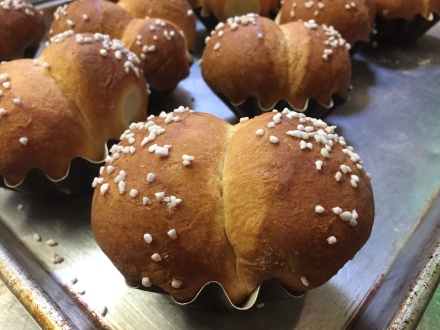
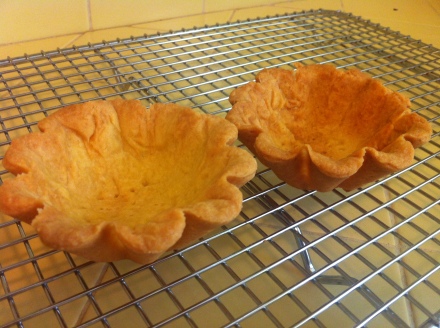
I used the small brioche pans I purchased from William Sonoma to make these individual shells.

IMG_6075

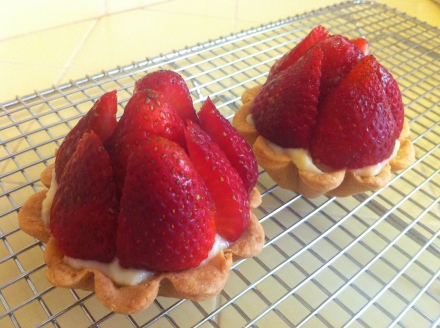
I tried a few different ways to place the strawberries and this seems to work the best.  I put the whole strawberry, sans stem, in the middle, and arranged the sliced berries around it.

IMG_6084

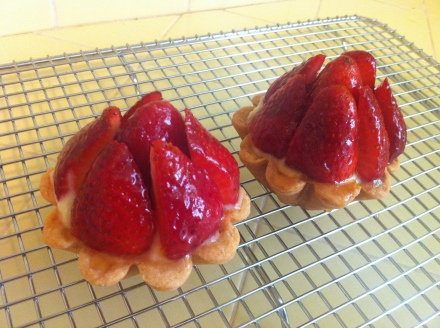
I used the apricot jam and water mixture for the glaze.  Definitely take the time to do this final step, as it makes the tarts look more professional (and it tastes great).

Happy baking!