Episode 5: One Minute Gourmet: Renaud’s Patisserie and Bistro

IMG_5345

My husband discovered this quaint little French patisserie in Santa Barbara a few years ago.  The place is so charming, I imagine this is how Jane’s The Bakery from the movie, It’s Complicated, would be like if it really existed in the lovely seaside town.

Renaud’s Patisserie and Bistro, a small shop tucked away in the corner of a shopping center, is not as flashy or as big as the fictional bakery in the movie, but I would imagine the feeling you get would be similar, with the aromas of buttery croissants and dark roasted coffee beans welcoming patrons walking into the door.  It’s absolutely heavenly.

So, ever since the discovery, we’ve been driving to Santa Barbara, just to get our eager hands on the mouthwatering Almond Croissant (and macarons … and apple tarts … and financiers … and …).  Those trips were made willingly, of course, but we wished that there was a way to get a hold of the goodies without the 100-plus mile drive up the 101 freeway.

Well, well, what do we know.  There was Renaud’s inside the Gelson’s supermarket in La Canada, which is a mere 20-mile drive from our place, THIS ENTIRE TIME!  eek

Sure, a part of me was extremely ecstatic at the idea that those amazing sweets are available just around the corner for us now, but I also did have a momentary “W … T … F” moment, like “Ummm … I would like to get reimbursed for the money I spent on gas all these time, thank you very much.”

635 Foothill Blvd, La Cañada Flintridge, CA 91011

Surfas Breadmaking Class: Bread #5: Brioche

IMG_0476

I think it was my mother who once told me that if I want to quit eating sweets, I should make them myself. She said that if I see, first hand, how much sugar and fat are in it, I will surely quite eating it. Her point was valid because I no longer consume buttercream frosting after learning how much artery-clogging butter went into making the frosting during my cupcake-making days.

Because of that reason, I was very hesitant to bake Brioche at the bread workshop at Surfas Culinary District in Culver City. I just wanted to forever stay in a sugar-coated world where I was completely oblivious to the amount of butter and eggs that were packed in those cute, seemingly innocent French pastry.

But I suppose I can’t stay sheltered forever. It was time for me to face the music.  Here I go!

IMG_0371

A stand mixer definitely comes in handy in making the dough. I can’t imagine trying to do this by hand.

First you need to dissolve the yeast by whisking it with milk. Then add the flour and mix in a stand mixer with a dough hook. Add eggs and mix for 4-5 minutes.

Increase the speed to medium, and slowly add the butter (BUTTER!), tablespoon or two at a time. Continue to mix for 15 minutes to develop the gluten for a light, airy structure in bread.

IMG_0389

Now add sugar and salt and mix for 5-8 minutes. Conduct the “window pane” test (spread a tiny dough piece with your fingers into a thin translucent layer). If you can see through the layer without it ripping, you are ready to transfer the dough onto a buttered sheet pan and cover it with a plastic wrap.

Let it sit for at least 6 hours, or overnight.

IMG_0431

After the dough has rested for at least 6 hour, or overnight, turn the cold dough onto a greased pan. Divide the dough in half.  Then press one portion of dough into an even rectangle about 2 inches thick.

IMG_0437

Take the rectangle in half lengthwise and cut it crosswise into 6 equal portions. The recipe makes a total of 12 equal pieces.

IMG_0439

Roll the dough into balls.

IMG_0440

You have many option to shape the Brioche (i.e. in a loaf pan) but we made many small ones with little 2-3 balls per baking cup.

Place the Brioches in a pan.  Cover the pan loosely with plastic wrap and set them aside for about 45 minutes until the dough has risen to the level of the pan rim.

IMG_0445

Unwrap the dough, brush them with melted butter and sprinkle with sugar.  Bake at 350 degree F for 30 minutes, rotating the after 20 minutes.  Reduce the oven temperature to 325 degree F and continue to bake or 25-30 minutes, or until they are golden brown on top.

IMG_0473

Transfer to cooling rack and let them cool completely.

IMG_0474

Look at these cute little Brioche!  They look like baby’s little bums!

So making Brioche wasn’t as scary as I thought.  Yes, there are quite a bit of butter (almost two sticks, to make two 8-1/2 inch loaves) and eggs (three altogether) but it’s not that bad as long as you just eat only one or two of the little ones.  It’s difficult to stay disciplined though because these little morsels are lovely, so lovely that you really can’t decide if they are bread or actually pastry.

IMG_0486

I ate one in class while it was still warm, and another one with a cup of coffee when I got home that afternoon.

Everything about Brioche was a music to my ears … and my tummy.

Cronuts

IMG_9309

Maya and I finally got to experience the real Cronut during our recent trip to New York City. The famous croissant and donut hybrids were sold out on our last visit, so we decided to make it our priority to get our hands on them this time around. We dropped off our luggage in Midtown and made a beeline to Dominique Ansel Bakery in Soho.

IMG_2491

There was already a line, about 20 people deep, when we arrived around 9:00 a.m. We had to wait for about an hour just to get inside the shop, which was another 20 minutes or so. We were a bit surprised because we thought the Cronut fever has died down by now, especially with all the other donut shops and patisseries offering copycat treats, but that surely wasn’t the case. The lady in front of us, a regular, told us that the line is usually much worse earlier in the morning.

IMG_2493

The Cronuts were already packaged in a yellow box and stacked near the register to speed up the line. Maya ordered a cup of coffee and I grabbed a cup of Earl Grey tea and seated ourselves on a small table near the door.

Now, the moment of truth …

IMG_2496

What I liked:

The Cronut definitely tasted more like a croissant than a donut, unlike some imitation faux-nuts (or “do-ssant”) at neighborhood 24-hour donut shops. It tasted like a very sophisticated dessert. I enjoyed the slight chewiness of the dough as well.

What I didn’t like:

A little too much pastry cream in the middle. The flavor of the day was strawberry and although I enjoyed the sweet and tangy combination of the berries, the cream tasted slightly off to me. I would have loved to try the simple vanilla pastry cream instead.

The verdict: ★★★★☆

IMG_2499

Extra: We ordered bake-to-order mini Madeleines. They were good but weren’t eye-popping or anything.

IMG_2497

Mexican Chocolate Ice Cream

IMG_5474

Are you looking for an ice cream with a little twist for summer? Try this grown-up version of the traditional chocolate ice cream, with a fire-ry heat from Cayenne pepper! It uses 2% fat milk and no cream, so it’s a slight healthier version of the popular treat. And you don’t need an ice cream maker to make it.

Mexican Chocolate Ice Cream
(Makes 1 quart)

3 cups milk (I used 2% and it still came out creamy)
3 egg yolks
140 g (5 oz) dark chocolate (I used 70% cacao)
½ cup granulated sugar
4 tablespoons Dutch-process cocoa powder (unsweetened)
1 tablespoon vanilla extract
¼ teaspoon cayenne pepper
Pinch of salt

① Heat milk in a saucepan, over low heat. Mix in cocoa powder, chocolate and sugar and stir with a whisk until they dissolve completely. Be careful not to boil the milk.

② In a small bowl (I used a measuring cup), separate the eggs. You’ll only use yolks here. Mix the yolks. Temper by pouring a ladle-full of hot milk into the egg yolks. Once mixed, pour the eggs and milk mixture slowly back into the saucepan and stir. Add vanilla extract and salt. Stir until the mixture thickens (you know you have the right consistency when the mixture thinly coats the spatula).

➂ Remove the saucepan from the heat and transfer the mixture into a separate bowl. Set aside for about an hour, covered with plastic wrap, until the mixture cools to room temperature.

④ Once the mixture has cooled, pour it into a one-quart container and put it in a freezer. Take the container out of the freezer every hour, three times, and stir the ice cream. Enjoy!

IMG_5468

I think the bitter chocolates work best for this ice cream. The not-so-sweet lusciousness can stand up to the powerful heat of cayenne pepper. I used the Trader Joe’s chocolates bars that I received as a gift from my friend Mary Lee.

Just to note — because no heavy cream was used, this version doesn’t have the creaminess that you might be accustomed too in ice cream. But it has a really refreshing icy texture that’s simply wonderful. I love cayenne pepper but definitely reduce the amount if you’re not a huge fan of the tingling heat.

Happy June, everyone!

Empowering, One Dorayaki At a Time

IMG_4313

I remember when my family and I first came to the states back in the 80s, it was virtually impossible to find delicate, French-inspired confections what rivaled those available in Japan. Dense sugary cakes topped with thick buttercream (with artificial colorings) and overly sweet and brick-like brownies filled the supermarket bakery counters, and those airy sponge cakes that we were so accustomed to were nowhere to be found.

That’s when my mother learned to bake at home. I think she baked almost every day one year. I looked forward to coming home from school every day, knowing that lemon-infused madeleines (she baked them in cupcake tins because she didn’t own a shell-shaped pan) and heavenly chocolate vodka cakes (yes, vodka!) would be waiting for me upon my return.

The dessert landscape has certainly changed in recent years. It’s now possible to bring home wonderful, high-quality cakes, cookies, macarons and any other confections imaginable, from even as close as your local neighborhood grocer. But there’s something still very empowering about baking things you crave at home, in your own kitchen, whenever you want, however much you want.

My recent empowering moment – making dorayaki, one of my favorite Japanese confections, at home! When the craving strikes, but a trip to a nearest Asian supermarket is out of reach (with a little bebe sleeping in the crib), we’ve gotta do what we’ve gotta do to satisfy the urges!

Dorayaki
(Makes 12 pancakes; 6 dorayaki)
Recipe taken from Cooking With Dog; I doubled the recipe to make more

Ingredients:

4 eggs
160 g granulated sugar
2 tablespoons honey
1 teaspoon baking soda
100 ml water
260 g cake flour
5 tablespoons water (to adjust the thickness of the batter at the end)
18 oz (1 large can) Azuki (sweet red bean paste)

Instruction:

IMG_4280

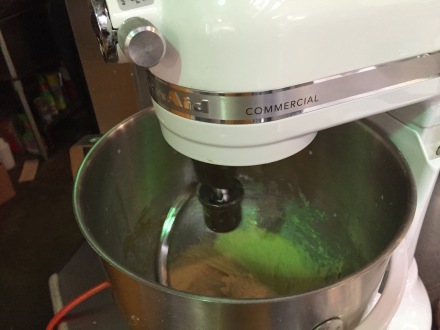
① Beat eggs, sugar and honey with a whisk. Beat the mixture for about 15 minutes. I used a stand mixture with a whisk attachment.

② In a separate bowl or a cup, dissolve the baking soda with water. Add it to the egg mixture, and mix.

IMG_4283

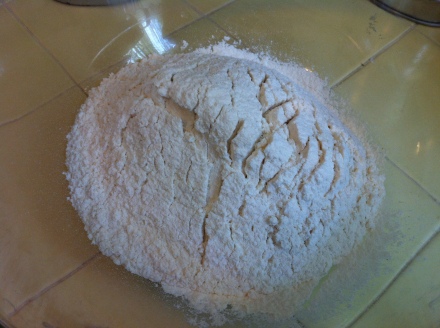
③ Sift cake flour and add it to the egg mixture; mix but be careful not to over mix.

IMG_4286

This is the consistency of the batter.

IMG_4287

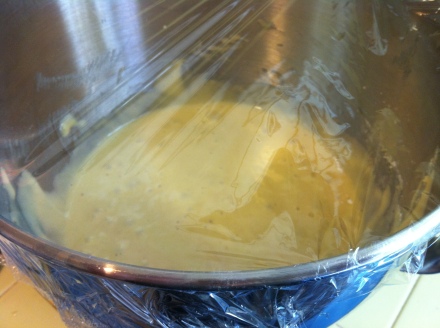
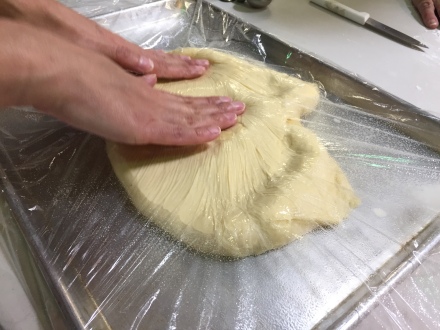
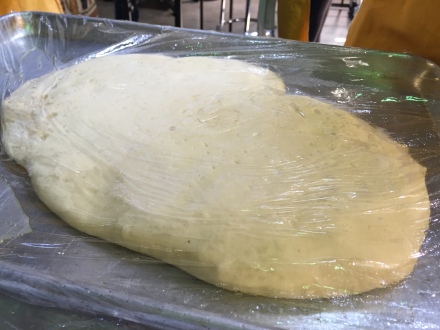
④ Cover the bowl with a plastic wrap and set aside for about 30 minutes.

IMG_4289

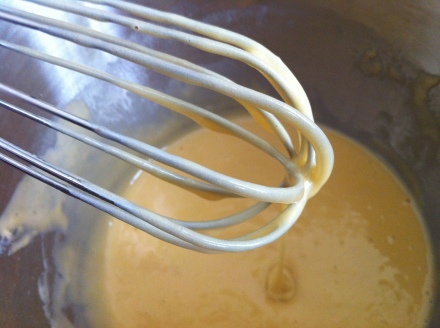
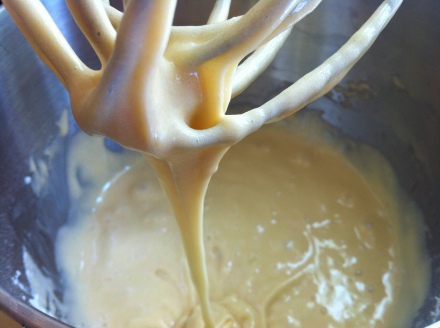
⑤ Adjust the thickness of the batter by adding water, one teaspoon at a time, to achieve the perfect consistency.  This is the consistency that you’re looking for.  You want the batter to flow down the whisk effortlessly without being too runny.

IMG_4297

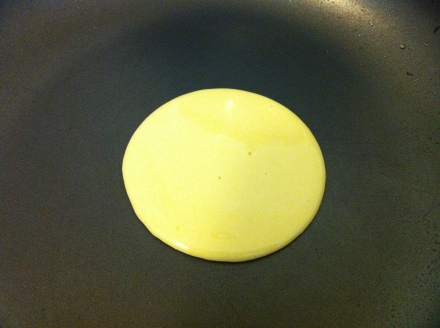
⑥ Heat a griddle or a non-stick pan.  Drop the batter onto the griddle or pan; it should naturally form a circle when you drop the batter gently.

I noticed that the surface will come out perfectly brown (without any inconsistent spots) if you don’t oil the pan.  Make sure to use the non-stick kind so the pancake slides right off the surface.

IMG_4298

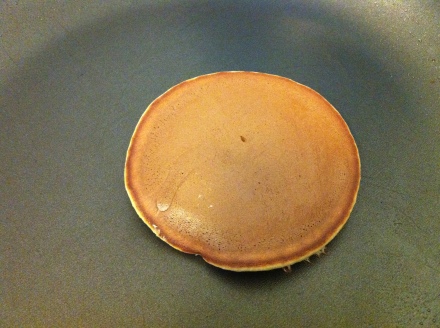
⑦ Flip the pancake when the bubbles form on top.  Cook the other side for about 20 seconds.

anko

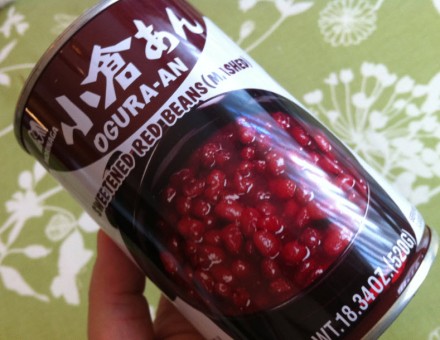
⑧ Get the pre-made anko (sweetened azuki beans) ready.  You can get this at most supermarkets (in Asian grocery aisle) or at Asian stores.  You can always make your own but I found the canned version to be too delicious to pass up.  I can eat the entire can by myself in one sitting!

IMG_4306

⑨ Scoop about 2 tablespoons of anko and layer it onto one side (the “wrong” side) of the pancake.

IMG_4310

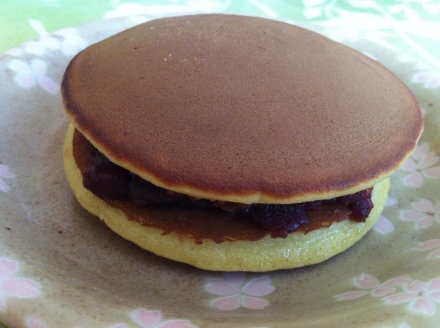
⑩ Take the second pancake to sandwich the anko.  You’re all done!

dorayaki

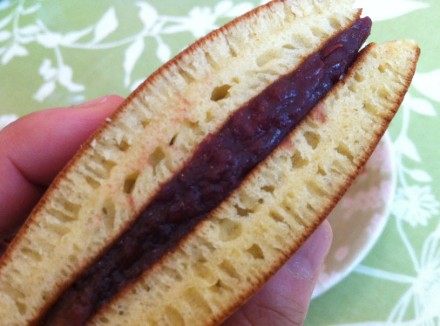
These dorayakis are amazing. The cakes (called “castella” in Japan) are perfectly bouncy (different from a regular breakfast pancake) and the combination between the sweet cake and azuki is simply divine. I might like the homemade version better than the store-bought ones!  If you store them in the refrigerator, it’s best to bring them to room temperature before you eat them by leaving them out for about 15-30 minutes (they are much softer at room temperature).

I’m glad I found a YouTube cooking show called, “Cooking with Dog,” that shows viewers how to make Japanese food and desserts.  Each show is narrated by an English speaking dog, Francis, with thick Japanese accent. It’s hilarious and informative – do check it out!

A Sweet, Sweet Gift

IMG_3971

A group of wonderful ladies from a collegiate hockey team that Kevin coaches showered us with heartwarming baby gifts – a handwritten card signed by the entire team and a Kate Spade Stevie diaper bag!

This was a total surprise. You should have seen my face when Kevin walked in with a giant Kate Spade box one night. I now carry this bag everywhere I go with Pon Pon because it makes me feel like a chic mom that actually cares about style … which, in reality, am totally not. lol

We are so blessed to have such great people in our lives.

IMG_3980

Now that things are starting to settle down a bit (translation: we can sleep for an hour at night now — yipee!), I was able to sneak into the kitchen for a few hours this morning to bake my favorite chocolate chip cookies for the ladies as a thank you gift!

I used the Neimen Marcus recipe and made four batches of these heavenly munchies. I don’t think I’ve made such a large batch before — the entire apartment and I smelled like butter all day!

sticker

I stuck a Lavender and Olive sticker on the box for a little personal touch! I hope they enjoy the sugar rush after their game tonight!

My Favorite Macarons shop in LA: ‘Lette Macarons

I am a shameless bandwagoner when it comes to food trends. I might not be the first one to jump on the newest craze (and may not understand what all the fuss is about at times), but I’ve done my share of waiting in long lines at Sprinkles Cupcakes, Bread Papa’s, and Pinkberry when they first opened their doors to the hungry and curious public. I am surprised that I never got into the food truck phenomenon all that much, but my fiancé and I did fork out a fortune for the Korean BBQ tacos when we spotted the Koji truck parked in our neighborhood.

The current food trend that blows all the others out of the water is the macaron sensation. These delicate French cookies make this Francophile forget about all the warm and fuzzy feelings I once had for pint-size cakes and tangy swirly goodness. They are one of my favorite things in the world, and I know that my love for these little heavenly morsels will last forever, even when something new comes along and eventually takes over the pastry world.

My new favorite macaron shop in Los Angeles is ‘Lette Maracons. I tried it out for the first time over the weekend (at the Little Tokyo location) and fell absolutely in love. They tasted very close to the macarons I ate and loved in Paris, especially the Earl Grey Tea and Rose favored ones.

There are many, many debates on the blogosphere over who has the best macarons in town. I’m no expert in the maracon field, but what makes them perfect, in my book, is the impeccable combination of airiness and chewiness. I love it when the shells flake off and instantly melt in my mouth, while the sweet filling provides the perfect bite of luscious gooey-ness. These ‘Lette macarons provide the perfect pairing of both. It’s no surprise, from the first bite of its macaron, that Paulette Koumetz and Christophe Michalak, two magicians behind this operationare, are authentically French.

I can seriously eat these all day.

The only bone to pick with ‘Lette is this: Why is it that you charge $1.70 for one macaron but charge $10.50 for a box of 6? Shouldn’t it be $10.20?  The box is not worth $0.30.  I was hoping for a price break for buying the set, not realizing that I was paying extra for the box that I didn’t even need or want. Eeek.

‘Lette Maracons
Various Locations: Beverly Hills, Pasadena, and Downtown LA
★★★★★

P.S. Is it just me or does this Colombian Coffee macaron look very much like Baby Ike?